I’ve never really wrote a tutorial before so apologies if this is bad
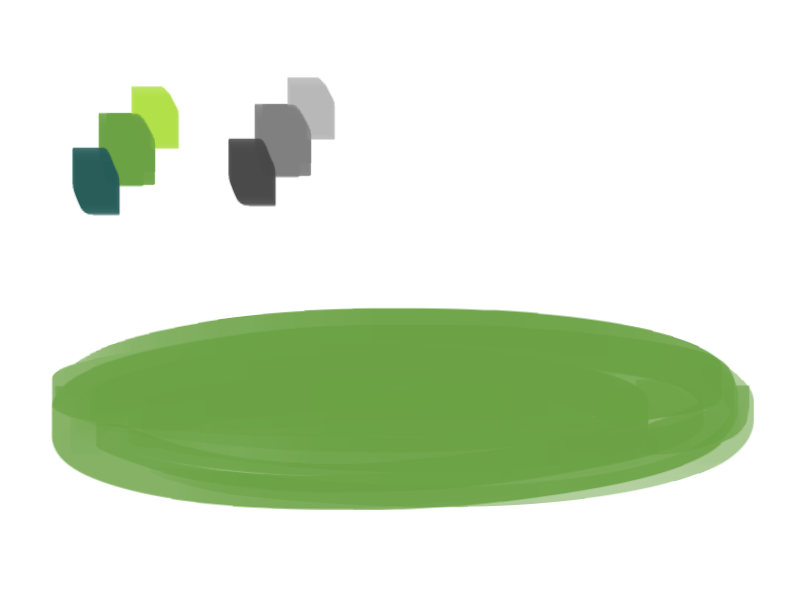
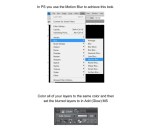
1. okay first thing I do is pick three colors, a mid, dark, and light. I like to check the colors in greyscale to make sure there’s enough contrast between each one.
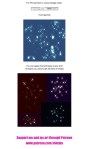
I then plop down a blob of whatever my middle tone color is.
2. next, I take my dark color and just sort of randomly place it around. I try to make sure there’s a good amount of both the mid and dark tones spread throughout. I personally like to keep it kinda messy. I also have pen pressure on for both brush size and opacity, so I can have some blending action going on.
3. for the next step I do the exact same thing as before, except with the light color.
4. aight this is where we start adding details. see how you just have a bunch of colors and edges where two colors meet? use the eyedropper and go to an area where two colors meet, eyedrop a color, and then use that color to draw in your grass blades. I do this at every point where colors meet. should note I personally like to use a square brush, but you can really just use anything.
5. you can technically stop at the last step if you’re going for a more simple look, but to add more details I go to the “empty” areas of solid color and just draw in random strokes using a color nearby. it’s just a way to fill up the empty space.
6. basically more of the same idea of eyedropping and drawing. for more variety so things look interesting, I like to add random plant shapes.
7. and so the grass doesn’t look too plain, I add random dots of color and pretend it’s flowers and stuff.
and there you have it, this is how I approach drawing grass.
Great question! When you’re starting to work in digital art, layers can be incredibly confusing to start out with. They seem almost like magic… but what are they, really?
Personally I also work in Medibang, so I think these screenshots will be helpful.
To begin with, let’s take this picture of a zebra I drew a little while ago:
It seems like there’s a LOT going on here. But actually, layers make it easier than ever to make your drawings feel nice and clean digitally. Lots of programs also have specialized tools to help you color effortlessly – and it’s VERY different from the traditional method of being careful to not color outside the lines.
First of all, let’s take a look at layers. What ARE layers? They are… well… a way to organize your art, for a start. Anything on the top layer will be BOSS and will (generally) be on top of everything else. That’s why most artists use the top layer for lineart, as you yourself said.
Artists can use SO MANY LAYERS. Like, some artists use 100+ layers in one piece. But that’s a lot, so let’s start with… 3. Just 3 simple layers. For example…
Now, let’s say you have this lineart and you want to color it. The color will go on the bottom, so that it doesn’t interfere with the lineart layer. But how do you color it? Well, you COULD do the very slow and tedious process of going over it bit by bit.
But that’s honestly very tedious and no one actually likes it. It leaves a lot of room for error, and it takes forEVER.
Instead, let’s make this easier.
HOW TO COLOR USING THE SELECT TOOL!
First of all, this requires that your lineart not have gaps. That means all black lines are connected.
Second, let’s go to our color layer and make sure it’s selected (and not the lineart layer)
Next, use the magic select tool on the left hand side. It looks like a little magic wand.
Click on the empty space you WANT to color. In my case, it’ll be the scarf area. Medbang will sense the area based on the visible lineart layer, even though you are still technically on the color layer.
(you can select multiple areas, like the two little ends of the scarf, by holding down the Shift key and clicking those areas)
The next bit is a bit more technical.
With these parts selected, you COULD just use the bucket tool and fill everything in. BUT, with the way digital programs work, you might end up with a VEEEERY thin layer of white between your lineart and your colors.
So what I (and a lot of artists) do instead is manually expand that selected area by just a few pixels to make sure that border is caught in the all-encompassing COLOR CONQUEST.
To do this, just go upstairs to the ‘select’ menu and click ‘expand’. Give it a few pixels, hit enter, and THEN use a filling technique of choice. I just throw a large square over the area.
Now, I know what you’re thinking. “okay, I have the flat colors. But what if I need to add details, like shading and patterns?”
Let me introduce you to our friend…. CLIPPING!
What is clipping? I thought you might ask. Well, consider this scenario. You have your color layer, your lineart layer – and between them – your shading layer. You want to shade stuff, but again, you might have to go through and color things bit by bit so as to make sure nothing goes outside of the lineart.
BUT look there! What’s that checkbox up at the top? It’s a bird! It’s a plane! It’s…. CLIPPING!
Go ahead and check that box – and it will trap your Shading layer in a prison…. a prison of the color layer!
Basically, clipping means you lock the layer onto the layer directly underneath it, and the shading will ONLY affect whatever exists below it. If you didn’t color outside the lines… the shading will also not cross that border.
Voila!
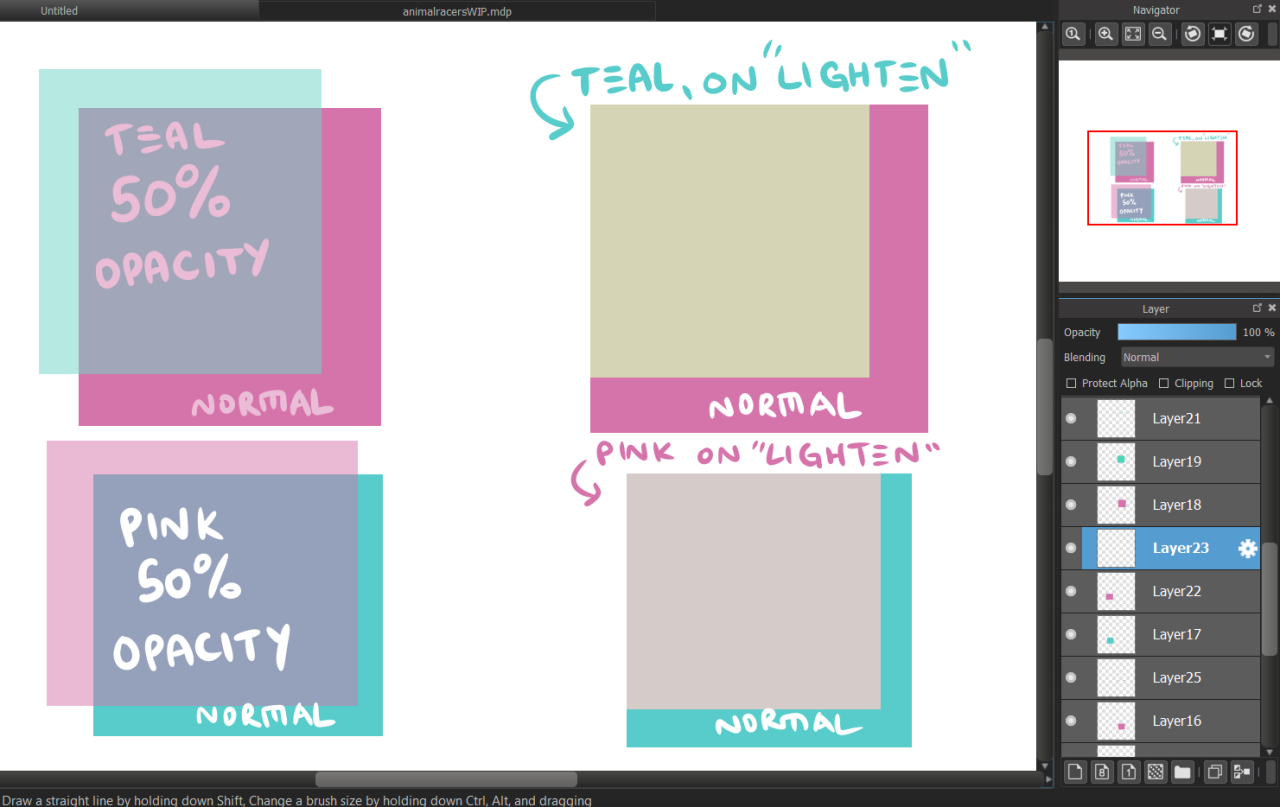
Now, layers are MUCH much more than this. We could probably have an entire class just about layers. However, I recommend just playing around and discovering as much as you can on your own. Digital art is a lot of fun, and opens many doors. You can allow layers to interact with each other in many crazy ways – there’s settings like “Lighten” and “Multiply” and “Overlay” that all have different functions and allow you to play with colors quickly and easily for your art.
But that’s a tutorial for another day.
Hope that helps!
– Mod Chekhov
I realize I wrote Motion Blur instead of Movable blur but you get the idea
This is one of my most asked questions so I am going to try and offer what advice I can. It certainly did not make any sense to me years ago and I would have liked a bit of help.
To preface this entire guide will be from the perspective of an artist attracting an audience for their work that is interested in buying and supporting their art.
Understanding and reaching the audience.
These are the people you want to see your work. If you are trying to create something commercially viable you must always keep the audience in mind. What matters to you is often lost on them and it is easy to lose track of that when you are emotionally involved in your work.
Everything I discuss from here on is centred around the audience and how they will potentially regard you and your artwork.
1. Time does not matter to the audience.
I see this brought up a lot. “I worked very hard for a long time on my art, someone else did not, why don’t people appreciate that.”
To be incredibly blunt, why should they? Two artists create two similar pieces of work. One took 3 days, one took 3 hours. Both are at the same technical level and a similar concept. Why should one be “worth” anything more to the audience, who only sees the end result.
Time rarely matters to the audience. An audience with no art background of any kind will find it very hard to judge how long someone spent on a piece of art (especially digital art) unless-
It’s very clear. A huge traditional painting for example, with something for scale. A linked video showing the process.
The artist states the time taken somewhere. Again, this is only really going to matter to the audience if it surprises them or justifies their own assumptions about the work. (It looks good, but they work quickly, how do they do it!)
I know there will be exceptions. People who really appreciate art will understand and recognise the time taken to create it. You aren’t leaving your success to exceptions though. You need to work with the majority.
Taking a long time to produce a piece of work only really informs your potential audience that they are going to have to wait a while to receive the content. If the work or the concept behind it are strong enough this is not a problem. It hurts an unknown artist trying to establish themselves though for the following reasons…
2. Your upload schedule.
People like consistency and the best way to capture any kind of audience in media is with quick regular uploads of content they are prepared for, are looking for or easily understand. I will list a few things that I feel an audience appreciates or deviates towards.
A regular upload schedule, be it daily, twice a week, even once a month. As long as it is clear. This is a great way to keep viewers coming back to you once they find your work and are happy with the content you appear to be providing.
The time you upload matters. If you post your artwork while the world is asleep no one is going to see it. On sites like tumblr this is even worse, hours can go by and your work will be pushed further and further down the audiences dashboard.
Consistent content. It’s great to try new stuff, but unless your audience knows you for it it could possibly confuse people browsing your page or site. Artists often get categorised as “The dude that draws X, Y Z” for a reason, it’s just easier for an audience to understand.
Do not add unnecessary comments to posts. Nothing puts people off more than 2 paragraphs of text explaining the process or a personal story on why it took so long. Save that for a separate post, consider that your audience needs to share your image. Make it as easy to share as possible.
3. Your content and the concept.
Content is important. Your finished artwork can be technically beautiful, but if there is nothing there for people to understand or relate to they will have no reason to care, or they will be purely judging your work on its level of technical ability.
That can only go so far if the content is too strange, specific or incomprehensible. Very few people are going to share a technically impressive piece of work if it disgusts confuses or upsets them in some other aspect.
Vice versa, a strong or interesting concept can take very simple artwork a very long way. The perfect storm is to have both a fantastic concept and strong artwork working together, but you must consider how much work that will mean you have to do and how fast can you do it. Find a balance.
What grabs an audience varies greatly. You can build up your own brand with your own ideas concepts and characters as long as there is a consistent theme. More often than not an audience will look for:
Things they recognise
Things they can understand at a glance
Things that are relevant to them and their lives
Consider these examples, try to consider which one has the most immediate appeal to the general public:
4. Make things easy for them, some important general advice.
Upload on as many sites as possible, and where appropriate. (No one on a website purely for webcomics is going to appreciate your oil paintings, for example).
Join forums, sign up for art sites. Get to know people and make contacts to get your work out there. Understand the audience on the sites you frequent and what content they do and don’t enjoy. This takes time, this does not happen overnight. You have to commit and find your own path here.
The audience will not just come to you. You need to be proactive. You have to get out there and find them, but be careful, nobody likes to feel like they’re being sold something.
Wherever you post your art, MAKE IT EASY FOR PEOPLE TO FIND AND SHARE! Tag, list and group your content. Tags allow people to find things they already like, make use of that. Give them as few reasons as possible not to share your content. Put yourself in the shoes of the audience and think about what they would and would not want to share with their friends and people that know them.
To conclude
I hope this will give some people who are really lost a few extra ideas when it comes to creating commercially viable content. It upsets me to say this but sometimes there are ideas that, no matter how beautifully illustrated or conceptually brilliant, will just not resonate with certain groups of people.
This is a sad reality, but if this is an issue for you don’t worry. Use this information to create content you know people will enjoy, make a profit from that and then when you have the time and money make the things you really want to make.