I have $24 to last me til Friday, what should I buy with it?
a pallet of ramen noodles
I hate ramen noodles tho
hmmmmm
bees?
Are you suggesting that I eat bees for a week
This is roughly what I make sure I have in my kitchen all the time along with rough estimates of local prices (MN). I buy a lot of things when they’re on sale and stockpile them.
instant oatmeal packets with fruit in them – $3 probably and this can be breakfast all week and maybe even a lunch or dinner too since you usually get 10 packets
bag of rice – $2-3 depending on size. 1 cup dry rice makes enough for about two meals depending on what you add in. if you get cheap rice, rinse it before cooking
canned beans – usually under $1 per can – mix the can with your rice and you have a meal. chili-spiced beans will make bean tacos. Rinse non-spiced beans before adding to anything.
Tortilla – usually around $3 but you get like 8-10 of them. Tacos, wraps, and quesadillas are all fair game here
lettuce – $2 max around here, either a head of something or bagged precut depending on preference, use as a salad or on tacos
protein other than beans of some sort – probably $5-7 for meat, $2-3 for eggs. sometimes I can get bags of frozen chicken breasts in this price range and each is usually 2 meals if I add in a bunch of veggies. fry/scramble eggs and add to any of the options.
your favorite stir fry sauce – $3ish
vegetables – $5ish. literally anything that you can 1. fry in a pan and 2. you’ll eat. fresh carrots are usually pretty cheap. get frozen if it’s cheaper and you’re strapped for cash/prep time on this part.
alternative to stir fry: pasta (~$2), fresh tomatoes (~$2), cheese (~$3).
cheese and fruit if you have extra – look if your store has loyalty cards for free that you can load coupons on for cheese there’s always one it seems like.
ahh thank you!!!
Reblogging because there’s never knowing who’ll need it.
Adding also: the single most nutritious food on earth is potatoes in their peel. Potatoes + some milk and butter = everything you need. They don’t last all that long, but they’re fairly cheap and the quickest cheat to “How do I not fuck my body up.”
(Cooked potatoes’ll last a while in the fridge. Potatoes nearing the end of their useful lives? Cook them to half-done first, figure out what to do with them later.)
Easiest baked potatoes: slice thinly but not paper-like, spread like cards, brush with oil (a silicone baking brush is totes worth the little it costs), spread salt and pepper (a little less than you think you’d like), cover with foil, stick in oven or toaster-oven at 150C for 40min. (If you have the patience, at that point click up to 180C, remove the cover and add 10-20min.) Reheats well, lasts in the fridge longer than it’ll take you to nom.
Dead-Animal-Free Whole Protein: some legumes + some grain. AKA rice and lentils, or rice and beans. (Maybe some fried onion for flavor; onion’s cheap and stays good a descent while. Fried onion makes everything taste better and keeps forever in the freezer, so frying up a bunch and keeping portions is not a half-bad idea.) (If going for the beans option – lentils are cheaper around here but fuck if I know what it’s like in your area – dump some tomato sauce and oil in; canola or soy are best health-wise, and far cheaper than olive; avoid corn.) Oh, what does instant couscous go for in your area? It keeps for fucking ever, it’s usually cheap, and it takes well to any and all added taste.
If you get to choose, black lentils taste the best and need the least soak-time (0-20min), green lentils are best for cooked stuff and red lentils are best in soups. (Red lentils + potatoes + root vegetables of choice + spices; cut into small pieces, cook, run through the blender if you wanna [stick blender’s awesome], freeze in portions.)
When possible, get instant soup mix. Get the good instant soup mix. (The kind that’s not made primarily of sugar, yeast or both. The rest is optional.) Dump 1/2tsp (or more, but start on the low end) into couscous, or chicken, or sprinkle over potatoes being stuck in the oven. Whatever. It’ll make most cooked-food-type things taste better. And again, lasts forever on the shelf.
If you can have eggs (goodness knows they’re sometimes expensive), dump some tomato sauce in a pan (tomato sauce lasts forever on the shelf), add some oil, onion/beans to cook in it, hot peppers if you wanna, then when it’s nearly ready crack an egg or two in. Hard-boiled eggs last a remarkably while in the fridge, so when eggs reach near the end of their usable lives, just hard-boil and stick in the fridge.
(Have eggs as often as you can, particularly as you have brain-shit going on. You need all the eggs, salt, and 60%-or-more chocolate you can get. Brains are made of cholesterol and salt, so folks with neuro or other brain shit need more of both. Potassium is also aces. You know what has the most potassium? Tomato paste.)
Grated cheese keeps in the freezer for ever. Grated cheese will make a lot of things taste nicer. Preserved lemon juice keeps forever in the fridge. Grated cheese + oil + lemon = instant and awesome pasta sauce that’ll liven up the weeks-old dry pasta in the fridge.
Slices bread also keeps well in the freezer. Try to have half a loaf or a loaf. Dry bread gets cut in cubes, mixed with oil and the aforementioned instant soup, stuck in oven at lowest until properly dry, then kept in an airtight jar to add to soups.
(Over-ripe tomatoes come cheaper. They get turned into soup or sauce, then frozen in portions.)
this is a very good post but why are we glossing over the fact that the alternative to ramen is bees
i have it on pretty good authority that bees are not an affordable eating alternative to ramen.
Seriously, bees are expensive
Trufax.
And speaking as someone who is also living off oatmeal, beans, and brown rice, if you need recipes, I have them!
Today I made 16 bean soup with chicken sausage and it was crazy good and I got 8 servings out of the one batch (froze half). I usually get the cheapest beans I can find, and GOYA bags of beans are usually $1-2. I soaked them overnight,rinsed them, and threw them in a gallon lidded saucepan with 2 boxes of chicken stock (also on sale for $2), two bay leaves, sauteed green pepper, onion, and celery, some garlic from a jar, about two tablespoons of dried herbs de provence,and the “fancy” bit was adding $6 bourbon and apple chicken sausages. You can actually sub veg stock for chicken and skip the sausage and make it vegan and it would still taste great.
Oh and I’ve been doing steel-cut oats. I don’t buy the name brand ones, I just pick whatever store brand/generic I can get for less than $4. They take about ½ an hour to make, but they’re super tasty and I make 2 cups
of dried oats at a time
with dried cranberries and that’s breakfast for 4 days at least.
I’ve also been making black bean soup, red beans and rice, and curried potatoes and chick peas. I got 100 quart and pint take-away containers from Amazon for $20 and they all stack neatly and are perf for one serving of whatever.
Additionally, depending on where you live, whole rotisserie chickens are something like $4-$7 and are easily 4 – 6 servings of protein and on TOP of that, if you stick the carcass in a ziplock bag and then the freezer you have excellent soup makings. Using bones in soup literally squeezes all viable vitamins and minerals out of the suckers. Soup made from lots of bones is great to keep around if you get sick, it’ll feed and sooth you relatively easily and as you get better you can add noodles. ON TOP OF THAT, a quarter to a half cup of soup broth added to a lot of dishes also adds those nutrients PLUS flavor.
I’ve never really wrote a tutorial before so apologies if this is bad
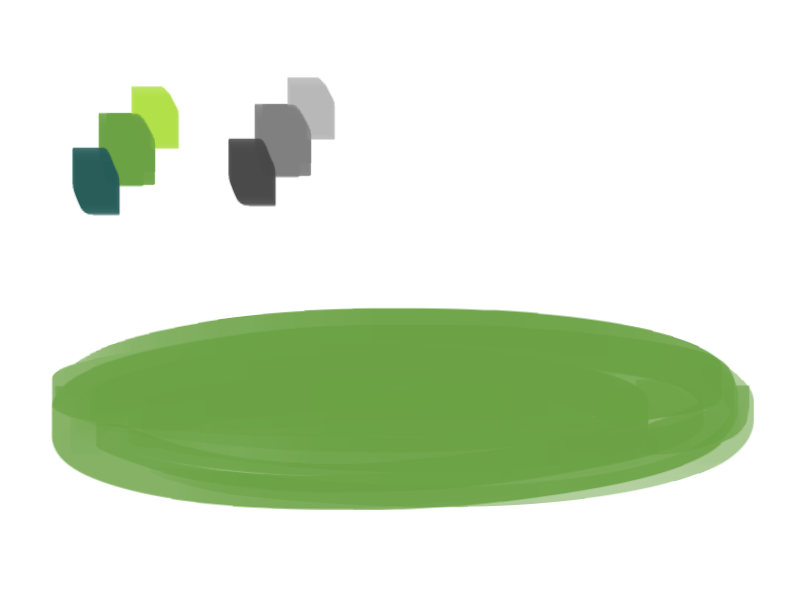
1. okay first thing I do is pick three colors, a mid, dark, and light. I like to check the colors in greyscale to make sure there’s enough contrast between each one.
I then plop down a blob of whatever my middle tone color is.
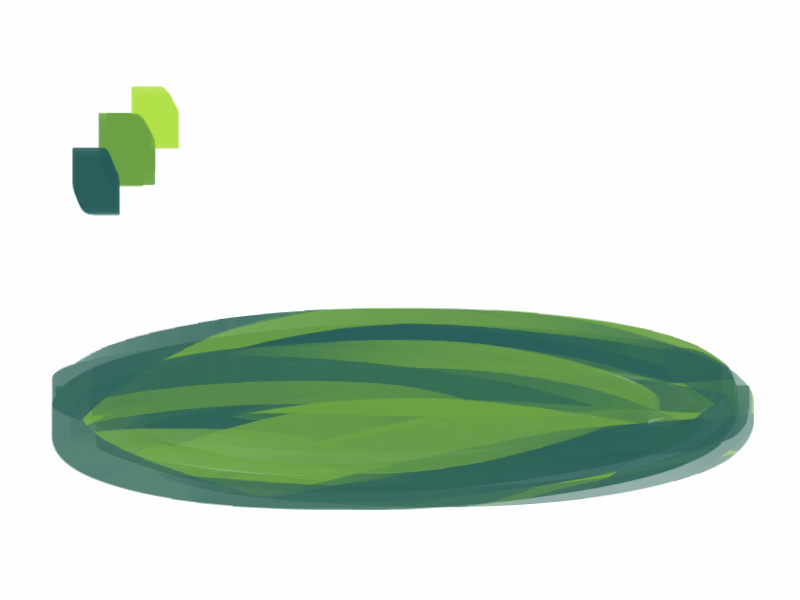
2. next, I take my dark color and just sort of randomly place it around. I try to make sure there’s a good amount of both the mid and dark tones spread throughout. I personally like to keep it kinda messy. I also have pen pressure on for both brush size and opacity, so I can have some blending action going on.
3. for the next step I do the exact same thing as before, except with the light color.
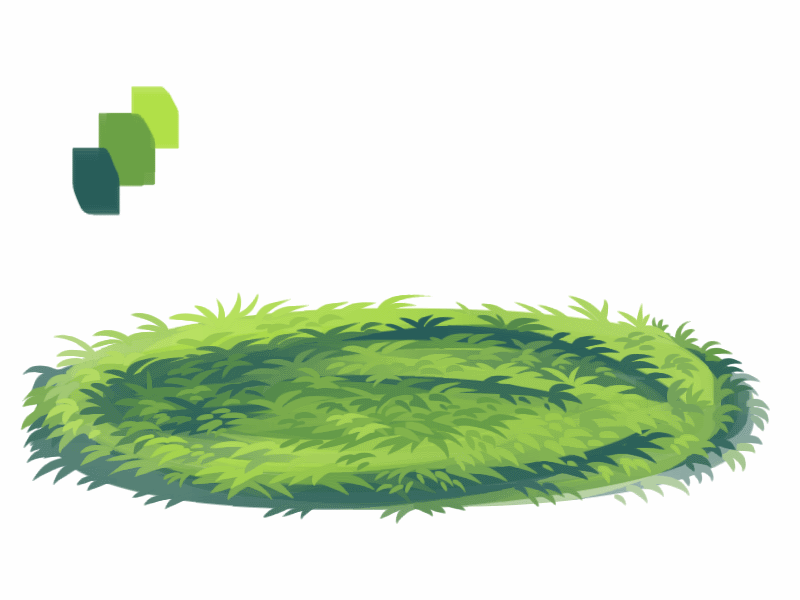
4. aight this is where we start adding details. see how you just have a bunch of colors and edges where two colors meet? use the eyedropper and go to an area where two colors meet, eyedrop a color, and then use that color to draw in your grass blades. I do this at every point where colors meet. should note I personally like to use a square brush, but you can really just use anything.
5. you can technically stop at the last step if you’re going for a more simple look, but to add more details I go to the “empty” areas of solid color and just draw in random strokes using a color nearby. it’s just a way to fill up the empty space.
6. basically more of the same idea of eyedropping and drawing. for more variety so things look interesting, I like to add random plant shapes.
7. and so the grass doesn’t look too plain, I add random dots of color and pretend it’s flowers and stuff.
and there you have it, this is how I approach drawing grass.
Great question! When you’re starting to work in digital art, layers can be incredibly confusing to start out with. They seem almost like magic… but what are they, really?
Personally I also work in Medibang, so I think these screenshots will be helpful.
To begin with, let’s take this picture of a zebra I drew a little while ago:
It seems like there’s a LOT going on here. But actually, layers make it easier than ever to make your drawings feel nice and clean digitally. Lots of programs also have specialized tools to help you color effortlessly – and it’s VERY different from the traditional method of being careful to not color outside the lines.
First of all, let’s take a look at layers. What ARE layers? They are… well… a way to organize your art, for a start. Anything on the top layer will be BOSS and will (generally) be on top of everything else. That’s why most artists use the top layer for lineart, as you yourself said.
Artists can use SO MANY LAYERS. Like, some artists use 100+ layers in one piece. But that’s a lot, so let’s start with… 3. Just 3 simple layers. For example…
Now, let’s say you have this lineart and you want to color it. The color will go on the bottom, so that it doesn’t interfere with the lineart layer. But how do you color it? Well, you COULD do the very slow and tedious process of going over it bit by bit.
But that’s honestly very tedious and no one actually likes it. It leaves a lot of room for error, and it takes forEVER.
Instead, let’s make this easier.
HOW TO COLOR USING THE SELECT TOOL!
First of all, this requires that your lineart not have gaps. That means all black lines are connected.
Second, let’s go to our color layer and make sure it’s selected (and not the lineart layer)
Next, use the magic select tool on the left hand side. It looks like a little magic wand.
Click on the empty space you WANT to color. In my case, it’ll be the scarf area. Medbang will sense the area based on the visible lineart layer, even though you are still technically on the color layer.
(you can select multiple areas, like the two little ends of the scarf, by holding down the Shift key and clicking those areas)
The next bit is a bit more technical.
With these parts selected, you COULD just use the bucket tool and fill everything in. BUT, with the way digital programs work, you might end up with a VEEEERY thin layer of white between your lineart and your colors.
So what I (and a lot of artists) do instead is manually expand that selected area by just a few pixels to make sure that border is caught in the all-encompassing COLOR CONQUEST.
To do this, just go upstairs to the ‘select’ menu and click ‘expand’. Give it a few pixels, hit enter, and THEN use a filling technique of choice. I just throw a large square over the area.
Now, I know what you’re thinking. “okay, I have the flat colors. But what if I need to add details, like shading and patterns?”
Let me introduce you to our friend…. CLIPPING!
What is clipping? I thought you might ask. Well, consider this scenario. You have your color layer, your lineart layer – and between them – your shading layer. You want to shade stuff, but again, you might have to go through and color things bit by bit so as to make sure nothing goes outside of the lineart.
BUT look there! What’s that checkbox up at the top? It’s a bird! It’s a plane! It’s…. CLIPPING!
Go ahead and check that box – and it will trap your Shading layer in a prison…. a prison of the color layer!
Basically, clipping means you lock the layer onto the layer directly underneath it, and the shading will ONLY affect whatever exists below it. If you didn’t color outside the lines… the shading will also not cross that border.
Voila!
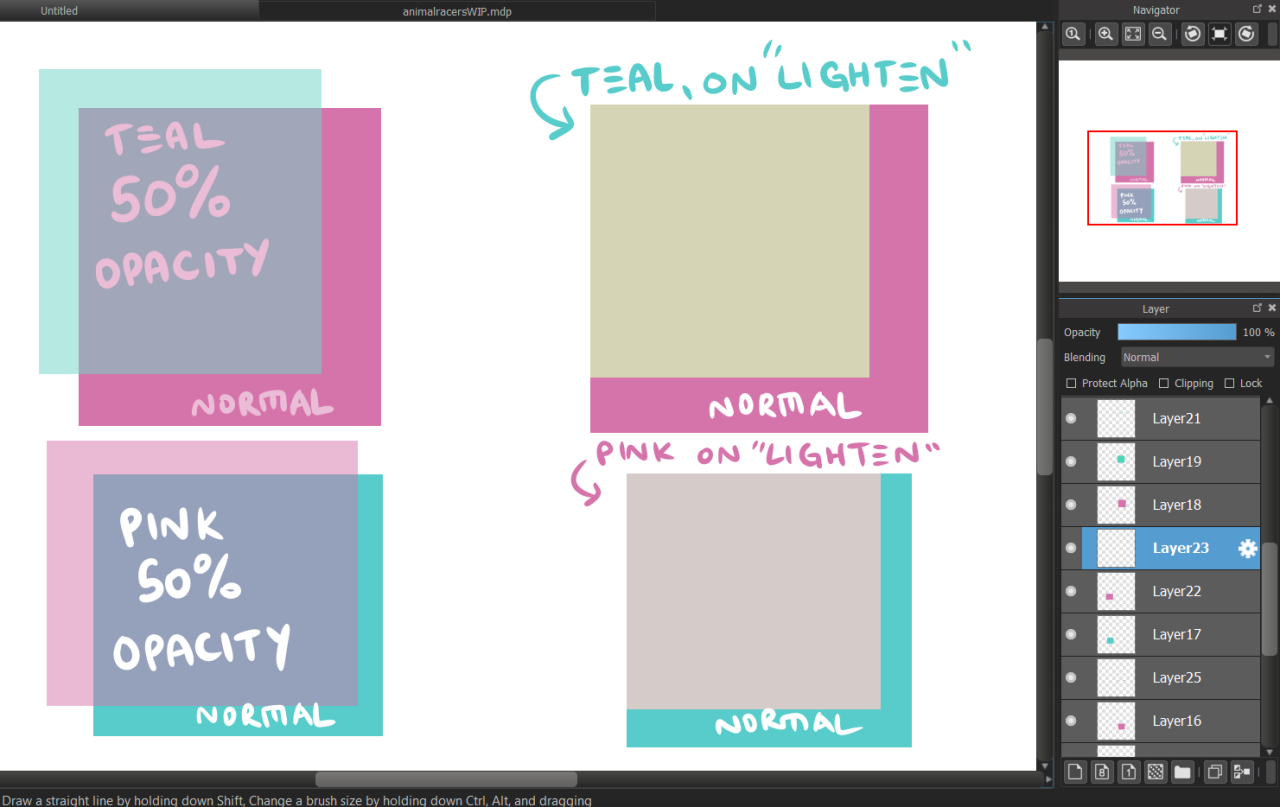
Now, layers are MUCH much more than this. We could probably have an entire class just about layers. However, I recommend just playing around and discovering as much as you can on your own. Digital art is a lot of fun, and opens many doors. You can allow layers to interact with each other in many crazy ways – there’s settings like “Lighten” and “Multiply” and “Overlay” that all have different functions and allow you to play with colors quickly and easily for your art.
I had a sudden strike of inspiration again for making a generator! Hope someone finds it useful 🙂 Drag or screenshot!
Note: I encourage to pick 2-3 times from the additional/special abilities squares. Also to just take the body type square as a inspiration and not super strictly.
(Had to make a new version because tumblr messed with the gif on the original and won’t let me edit my own posts…)
As a spoonie witch, using magic to help regain my mental and physical energy has been extremely helpful. I decided to compile some resources to make life easier!
Fae star (septagram), milk, apples, wild flowers, mushrooms, alchohal, fairy statues, butterfly and/or bee symbolism, dried or fresh fruits, fresh water, plants, bells, bubbles, non-plastic glitter, tree symbolism, dancing, 4 leaf clovers, nuts and seeds
Don’ts: anything plastic or unnatural like plastic glitter (that’s littering and fae hate littering), chocolate (it’s extremely dangerous for animals), Himalayan salt (it gets its pink color from iron and iron repels fae)
Rivers, stone or tree arches, lakes, springs, mountains, old trees, (wishing) wells, hills, wildflower fields, stone circles, flower gardens, rainbows, clover patches, mushroom circle
🦋Fae Elements (7 elements of fae):
Water, Earth, Air, Fire, Moon, Sun, Stars
🔮Spells and magic fae can help with:
*this isnt a complete list, but it’s a list of what I’ve found fae to be the MOST helpful at
Cottage witchcraft, kitchen magic, garden magic, prosperity, happiness spells, elemental magic, art magic, life witchcraft, animal magic, cannabis magic, solar and lunar magic, nature magic, air witchcraft, fertility spells, magic/witchcraft that has to children
🌸stay hydrated with fruit infused water and floral infused water (or teas)
🌸have an outdoor tea party or picnic to honor the fae
🌸 make offerings regularly, especially before asking for favors
🌸 things going missing or lost things suddenly reappearing is a sign of fae near
🌸 carry a satchet of, or wear a locket of rose quartz, thyme, st John’s wort, rose petals and lavender to attract fae and help you see them
🌸 dance, sing, or make art
🌸 make a faery wand with wood like yew, oak, rowan, willow, apple, holly, hawthorn, alder, or ash. Decorate it with pretty ribbons, shiny beads, and quartz
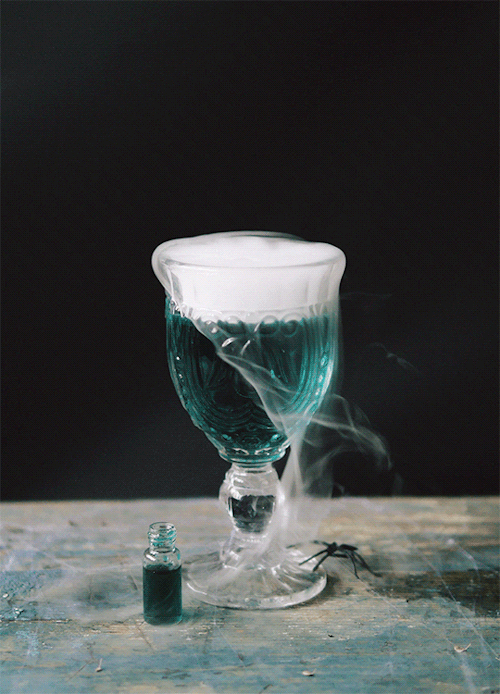
Here is a masterpost of a ton of potions I have in my grimoire that are simple and easy to make with simple easy to get ingredients.
Tea Potions
Headache Relief Potion
Ginger Root
Peppermint
Lemon Wedge
Steps: Add herbs to hot water and let them steep for a few minutes. Squeeze in lemon then let the wedge and skin soak for another 1 or 2 before drinking.
Sour Tummy Be Gone Potion
Chamomile Tea
Spearmint
Ginger Root
Spoonful of Honey
Steps: Brew tea then add herbs to it, let them steep for 5 minutes before stirring in your honey counter-clockwise to banish the cramps and sourness in your stomach.
Deep Slumber Potion
Chamomile Tea
Lavender
Dried Rose Petals/Buds
Lemon Balm
Steps: Brew tea then add in herbs to steep for 5 to 6 minutes, add sugar or honey to taste. Drink slowly before bed in a quiet place.
“Bring Me My Own Love” Self Love Potion
Rose Water or Rose Tea
Sugar
Milk or Milk substitute
Steps: Brew your tea or warm your rose water. Pour in milk and sugar to taste and stir it clockwise to welcome in your own love. Drink while doing something you enjoy.
Release from a Bad Day Potion
Green Tea
Catnip
Lemon Wedge
Steps: Brew and steep your tea and catnip, squeeze in your lemon and stir it counter clockwise to banish the negativity that the day has given you. Add sugar or honey to taste
Give My Heart Strength Potion
Black Tea
Orange Peel
Honey
Steps: Brew tea and let orange peel steep for 5 minutes, stir in your honey clockwise to bring yourself emotional strength.
Open My Mind Awareness Potion
Black Tea
Cinnamon
Milk or Milk substitute
(Optional) pinch of Mugwort (use with caution)
Steps: Brew tea and add ingredients. Sit in a quiet place and drink the tea slowly while centering yourself and if you can meditate.
Cleansing Potion
Moon Water
Rosemary
Thyme
Steps: Heat your moon water and let herbs steep for a minute or two before drinking. You may add sugar if you desire
Protect Me From Parasites Potion
(protects from psychic and energy parasites)
Moon Water
Rosemary
Mint
Steps: Heat moon water and steep your herbs for 5 minutes. Drink at the start of your day.
Coffee Potions
Strength For a Big Day
Coffee
Cinnamon
Sugar to Taste
Like a Storm Confidence Potion
Coffee
Hazelnut creamer
Cinnamon
Fresh Orange peel
Spark of Creativity Potion
Coffee
2 Drops Vanilla extract
Fresh Orange Peel
Spoonful of Caramel
Romancing Myself Potion for Self Acceptance
Coffee
Hot chocolate mix
Milk
Red rose petal
To Good Friends Friendship Potion
Coffee
Caramel
Sugar
A cherry
A good friend to share it with
Hot Chocolate Potions
Warm My Bones Happiness Potion
Hot chocolate
Marshmallow/Marshmallow fluff
1 drop vanilla extract
Cherry
To Get Through Hard Days Potion
Hot Chocolate
Cinnamon
Milk
Fresh Mint Leaf
For Enhanced Energy Potion
Hot Chocolate
Orange Peel
Gem Elixir Potions
Note! Unlike the others, these ones are NOT edible nor should they be ingested! These potions are for anointing or bath magic.
None of these potions are made with the crystals in the water! I ALWAYS put my crystals around a jar or cup of water to charge over night. SOME OF THESE CRYSTALS SHOULD NEVER GO IN WATER!!! So please just place them around your jar of water over night, not in it.